Westinghouse ceiling fan and light remote control white finish fans support faq 78792 infrared rf controller touch screen 77841 lighting backlit display panel black how to wire install a with fixture removal universal kit 3 in 1 temu united arab emirates 7787400 thermostat lightingnbeyond com

Westinghouse Ceiling Fan And Light Remote Control White Finish

Ceiling Fans Support Faq

Ceiling Fans Support Faq

Westinghouse 78792 Infrared Remote Ceiling Fan And Light

Rf Remote Ceiling Fan Controller Touch Screen Westinghouse 77841

Westinghouse Lighting Ceiling Fan And Light Remote Control Backlit Display Panel Black Finish

How To Wire And Install A Ceiling Fan With Remote Control Light Fixture Removal

Westinghouse Lighting Ceiling Fan And Light Remote Control Backlit Display Panel Black Finish

Universal Ceiling Fan Remote Control Kit 3 In 1 Temu United Arab Emirates

Westinghouse Lighting Ceiling Fan And Light Remote Control Backlit Display Panel Black Finish

Westinghouse 7787400 Thermostat Ceiling Fan And Light Remote Control Lightingnbeyond Com

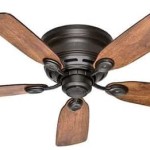
Westinghouse Stella Mira 52 In Indoor Oil Rubbed Broe Ceiling Fan With Remote Control 7217100 The Home Depot

Universal Ceiling Fan Remote Control Kit Small Size Light Sd Timing 3 In 1 Wireless For Hunter Harbor Breeze Westinghouse Honeywell Other Lamp Yahoo Ping

Universal Ceiling Fan Remote Control Kit 3 In 1 Temu United Arab Emirates

New Smaller Size Universal Ceiling Fans Light Remote Control Kit 3 In 1 Fan Timing Sd For Hunter Harbor Breeze Westinghouse Honeywell Other Lamp Com

Westinghouse Alta Vista 52 In Led Matte Black Ceiling Fan 7205900 The Home Depot

Westinghouse 77878 Ceiling Fan Remote Control Duplicate 16 8 World

Westinghouse Eye Infra Red Remote Control Kit

Westinghouse 3 Blade Ceiling Fan 72501 Industrial Silver Gil Lec
Westinghouse ceiling fan and light fans support faq 78792 infrared remote rf controller lighting how to wire install a universal control 7787400 thermostat
Related Posts