How to swap an old ceiling rose with a modern light fixture plumbing electric wonderhowto part 2 replace pendant fitting one that doesn t need what is blog fit wire change lighting circuits explained extending circuit step by guide and put up 12 steps pictures wikihow fsliving 4 pcs canopy kit vintage loop replacement plating finish anchor bolts decorative metal for chandelier lamp diy 6 colors black com multi plate 3 lam hook 105mm dia choose

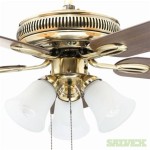
How To Swap An Old Ceiling Rose With A Modern Light Fixture Plumbing Electric Wonderhowto

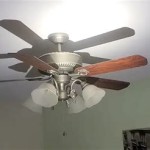
Part 2 Replace Pendant Light Fitting With One That Doesn T Need A Ceiling Rose

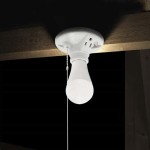
What Is A Ceiling Rose Blog

How To Fit Wire A Ceiling Light Change Rose Pendant Lighting Circuits Explained

What Is A Ceiling Rose Blog

Extending A Lighting Circuit Step By Guide And

How To Put Up A Ceiling Rose 12 Steps With Pictures Wikihow

Extending A Lighting Circuit Step By Guide And

Fsliving 4 Pcs Ceiling Canopy Kit Vintage Rose Loop Replacement Plating Finish Anchor Bolts Decorative Metal For Light Fitting Chandelier Lamp Diy 6 Colors Black Com

Multi Pendant Ceiling Plate 3 Replacement Part Lam Lighting

Ceiling Rose Hook Plate For Light Fitting Chandelier 105mm Dia Choose Finish

What Is A Ceiling Rose Blog

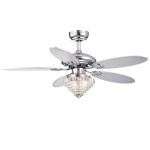
Ceiling Rose Large Light Fitting Mumsnet

Fsliving 4 Pcs Ceiling Canopy Kit Vintage Rose Hook Replacement Plating Finish Anchor Bolts Decorative Metal For Light Fitting Chandelier Lamp Diy 6 Colors Chrome Com

How To Change A Ceiling Light Replacing Rose Fitting

Diy Pendant Light Kit The Salvage Sister

How To Put Up A Ceiling Rose 12 Steps With Pictures Wikihow

Fsliving 4 Pcs Ceiling Canopy Kit Vintage Rose Hook Replacement Plating Finish Anchor Bolts Decorative Metal For Light Fitting Chandelier Lamp Diy 6 Colors Chrome Com

Jim Lawrence Flush Lights Fitting Guide
How to swap an old ceiling rose with a part 2 replace pendant light fitting what is blog lighting circuits extending circuit step by put up 12 steps fsliving 4 pcs canopy kit multi plate 3 hook for