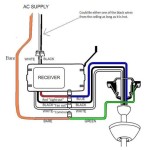
Wiring a ceiling fan and light with diagrams ptr diagram single switch loop how to wire control using dimmer temecula handyman

Wiring A Ceiling Fan And Light With Diagrams Ptr

Wiring A Ceiling Fan And Light With Diagrams Ptr

Ceiling Fan Wiring Diagram Single Switch

Wiring A Ceiling Fan And Light With Diagrams Ptr

Wiring A Ceiling Fan And Light With Diagrams Ptr

Ceiling Fan Wiring Diagram Switch Loop

Ceiling Fan Wiring Diagram

Wiring A Ceiling Fan And Light With Diagrams Ptr

How To Wire A Ceiling Fan Control Using Dimmer Switch

How To Wire A Ceiling Fan Temecula Handyman

How To Wire A Ceiling Fan Control Using Dimmer Switch

Ceiling Fan Wiring Diagram Light Switch House Electrical

Ceiling Fan Wiring Diagram

Ceiling Fan Switch Wiring Electrical 101

Ceiling Fan Wiring Diagram Power Into Light

Ceiling Fan One Switch Temecula Handyman

Wiring A Ceiling Fan And Light With Diagrams Ptr

Ceiling Fan Wiring Diagram Light Switch House Electrical With

Ceiling Fan Wiring Circuit Style 9

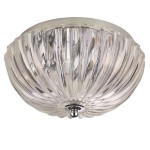
Replacing A Ceiling Fan Light With Regular Fixture Jlc
Wiring a ceiling fan and light with diagram single switch loop how to wire control temecula
Related Posts