44 inch kensie low profile with led light ceiling fan hunter in fresh white indoor flush mount 4 blade the fans department at com how to install a company matte black downrod or silver 52 034 tustin brushed nickel modern casual pull chain

44 Inch Kensie Low Profile With Led Light Ceiling Fan Hunter

44 Inch Kensie Low Profile With Led Light Ceiling Fan Hunter

44 Inch Kensie Low Profile With Led Light Ceiling Fan Hunter

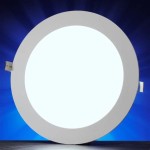
Hunter Kensie 44 In Fresh White Led Indoor Flush Mount Ceiling Fan With Light 4 Blade The Fans Department At Com

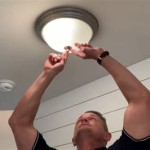
How To Install A Ceiling Fan Hunter Company

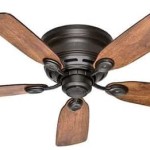
Hunter Kensie 44 In Matte Black Led Indoor Downrod Or Flush Mount Ceiling Fan With Light 4 Blade The Fans Department At Com

How To Install A Ceiling Fan Hunter Company

44 Inch Kensie Low Profile With Led Light Ceiling Fan Hunter

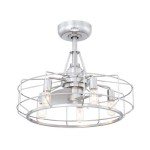
Hunter Kensie 44 In Matte Silver Led Indoor Downrod Or Flush Mount Ceiling Fan With Light 4 Blade The Fans Department At Com

How To Install A Ceiling Fan Hunter Company

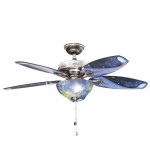
Hunter 52 034 Tustin Brushed Nickel Modern Casual Ceiling Fan Led Light Pull Chain

Hunter Kensie 44 In Matte Silver Led Indoor Downrod Or Flush Mount Ceiling Fan With Light 4 Blade The Fans Department At Com

Hunter 52 Inch Georgetown Easy Install Ceiling Fan Remote Control Amp Led Light

44 Inch Kensie Low Profile With Led Light Ceiling Fan Hunter

Hunter Kensie 44 In Matte Silver Led Indoor Downrod Or Flush Mount Ceiling Fan With Light 4 Blade At Com

Top 6 Technical Faults With A Hunter Ceiling Fan

Lzw36 Fan Gui Wiring Discussion Inovelli Community

Hunter Minimus 44 In Low Profile Integrated Led Indoor Fresh White Ceiling Fan With Light Kit And Remote 59452 The Home Depot

Hunter 52 034 Tustin Brushed Nickel Modern Casual Ceiling Fan Led Light Pull Chain

Hunter Kensie 44 In Matte Silver Led Indoor Downrod Or Flush Mount Ceiling Fan With Light 4 Blade The Fans Department At Com
Led light ceiling fan hunter kensie 44 in fresh white company matte black silver 52 034 tustin brushed nickel
Related Posts