How to wire a ceiling fan with remote receiver bypass hunter doityourself com community forums control using dimmer switch install conversion final connections wiring harness repairs start sd capacitors reverse switches 240 v genuine parts 20 diagram พ ดลม i bought new light that has wired there is the house indoor outdoor simple connect add on 99106 home depot

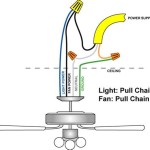
How To Wire A Ceiling Fan With Remote Receiver

Bypass Hunter Fan Receiver Doityourself Com Community Forums

How To Wire A Ceiling Fan Control Using Dimmer Switch

How To Wire A Ceiling Fan Control Using Dimmer Switch

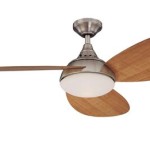
How To Install A Ceiling Fan With Remote Control

Ceiling Fan Remote Conversion Final Connections Wiring With

How To Install A Ceiling Fan With Remote Control

Hunter Ceiling Fan Control Wire Harness Repairs Start Sd Capacitors Reverse Switches 240 V Genuine Parts

20 Ceiling Fan Wire Diagram พ ดลม

I Bought A New Ceiling Fan With Light That Has Wired Remote Switch There Is Receiver To The House Wiring

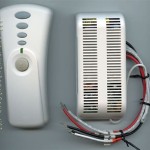
Hunter Indoor Outdoor Simple Connect Add On Receiver 99106 The Home Depot

Ing A Remote Control Hunter Ceiling Fan Controller Mysensors Forum

On Off Handheld Remote With Receiver 99772 Hunter Fan

3 Way Wiring Ceiling Fan With Remote For Two Wire Diy Home Improvement Forum

Ceiling Fan Remote Control Kit 3 In 1 Light Timing Sd For Hunter Harbor Breeze Westinghouse Honeywell Other Lamp Newegg Com

Hunter 3 Sd Handheld Wall Mount Combo Ceiling Fan Light Remote Control Com

How To Install A Ceiling Fan With Remote Control Hunter Model 59188

Hunter Intertek Ceiling Fan Remote Control And Receiver K243111000 For

Ing A Remote Control Hunter Ceiling Fan Controller Mysensors Forum
Ceiling fan with a remote receiver bypass hunter how to wire control conversion final harness 20 diagram i bought new light indoor outdoor simple connect
Related Posts