How To Replace Hampton Bay Ceiling Fan Capacitor Connection

How to Replace a Hampton Bay Ceiling Fan Capacitor Connection

Ceiling fans are a great way to keep your home cool and comfortable, but they can also develop problems over time. One common issue is a faulty capacitor. A capacitor is a small electrical component that helps to start and run the motor in your ceiling fan. If the capacitor fails, your fan may not be able to start or run properly.

Replacing a capacitor in a Hampton Bay ceiling fan is a relatively easy task that can be completed in about 30 minutes. Here are the steps you need to follow:

Step 1: Gather your materials

You will need the following materials to replace the capacitor in your Hampton Bay ceiling fan:

  • New capacitor (same capacitance and voltage as the old one)
  • Phillips head screwdriver
  • Electrical tape
  • Wire cutters

Step 2: Safety first

Before you begin working on your ceiling fan, make sure that the power is turned off at the circuit breaker. Also, be sure to let the fan cool down completely before starting.

Step 3: Remove the fan blades

The first step is to remove the fan blades. To do this, simply loosen the screws that are holding the blades in place and then carefully remove the blades.

Step 4: Remove the fan housing

Once the fan blades have been removed, you can remove the fan housing. To do this, locate the screws that are holding the housing in place and then remove them. Carefully lift the housing off of the motor.

Step 5: Locate the capacitor

The capacitor is typically located on the side of the motor. It is a small, cylindrical component with two wires connected to it.

Step 6: Disconnect the wires

Once you have located the capacitor, you need to disconnect the wires that are connected to it. To do this, simply use a pair of wire cutters to cut the wires. Be careful not to cut the wires too close to the capacitor, as this could damage the capacitor.

Step 7: Remove the capacitor

Once the wires have been disconnected, you can remove the capacitor. To do this, simply unscrew the capacitor from the motor.

Step 8: Install the new capacitor

Take the new capacitor and screw it into place on the motor. Make sure that the capacitor is securely tightened.

Step 9: Connect the wires

Now you need to connect the wires to the new capacitor. To do this, simply strip the ends of the wires and then connect them to the terminals on the capacitor. Make sure that the wires are securely tightened.

Step 10: Reinstall the fan housing

Once the wires have been connected, you can reinstall the fan housing. To do this, simply lift the housing up onto the motor and then secure it with the screws.

Step 11: Reinstall the fan blades

The final step is to reinstall the fan blades. To do this, simply align the blades with the holes in the motor and then tighten the screws.

That's it! You have now successfully replaced the capacitor in your Hampton Bay ceiling fan. Turn the power back on at the circuit breaker and test the fan to make sure that it is working properly.


Replace A Capacitor In Ceiling Fan

How To Replace A Capacitor In Ceiling Fan 3 Ways

3 Sd Ceiling Fan Pull Chain Switch

3 Sd Ceiling Fan Pull Chain Switch Wiring Pickhvac

Hampton Bay Ceiling Fan Capacitors

Hampton Bay Ceiling Fan Capacitors Fans

Ceiling Fan Wiring Schematics

Ceiling Fan Wiring Schematics Fans More

3 In 1 Capacitor Tal

3 In 1 Capacitor Tal

Replace A Capacitor In Ceiling Fan

How To Replace A Capacitor In Ceiling Fan 3 Ways

Ceiling Fan Sd Switch Repair

Ceiling Fan Sd Switch Repair

Hampton Ceiling Fan Wiring Harness

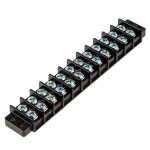
Hampton Ceiling Fan Wiring Harness Switches Parts Cap Cbb61 Ac250v

Zing Ear Ze 268s6 Wiring Instructions

Zing Ear Ze 268s6 Wiring Instructions Ceilingfanswitch Com

Hampton Bay Light Kit Not Working R

Hampton Bay Light Kit Not Working R Askelectricians

Leave a Reply

Your email address will not be published. Required fields are marked *

This site uses Akismet to reduce spam. Learn how your comment data is processed.