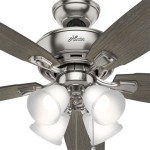
How To Replace Ceiling Fan 3 Way Switch

How to Replace a Ceiling Fan 3-Way Switch

Replacing a ceiling fan 3-way switch can seem like a daunting task, but with the right tools and a bit of know-how, it's a project that most DIYers can handle. Here's a step-by-step guide to help you through the process.

Tools and Materials

  • New 3-way switch
  • Screwdriver
  • Wire strippers
  • Electrical tape
  • Voltage tester

Safety First

Before you begin, make sure to turn off the power to the ceiling fan at the circuit breaker panel. Use a voltage tester to confirm that the power is off.

Step 1: Remove the Switch Plate

Using a screwdriver, remove the screws holding the switch plate in place. Carefully pull the switch plate away from the wall.

Step 2: Disconnect the Old Switch

The old switch will be connected to several wires. Use a screwdriver to loosen the screws holding the wires in place. Be careful not to drop the screws! Once the wires are loose, pull them away from the switch.

Step 3: Identify the Wires

The wires connected to the switch will be color-coded. Typically, black wires are used for power, white wires for neutral, and red wires for the switched power. However, it's always a good idea to use a voltage tester to confirm the identity of each wire.

Step 4: Connect the New Switch

Connect the new switch according to the wiring diagram provided with the switch. Typically, the black wires will be connected to the "common" terminals on the switch, the white wires will be connected to the "neutral" terminals, and the red wires will be connected to the "traveler" terminals.

Step 5: Secure the New Switch

Once the switch is connected, tuck the wires neatly back into the electrical box. Secure the switch in place using the screws provided.

Step 6: Reinstall the Switch Plate

Align the switch plate over the switch and secure it in place using the screws. Make sure the switch plate is tight against the wall.

Step 7: Turn On the Power

Return to the circuit breaker panel and turn the power back on. Use the switch to test the ceiling fan and make sure it's working properly.

Tips

If you're not comfortable working with electricity, it's best to contact a qualified electrician. Make sure the switch you purchase is compatible with your ceiling fan. If you're replacing a switch in a multiple-switch setup, make sure to keep track of which wires go where. Don't forget to wrap electrical tape around the exposed ends of the wires to prevent short circuits.

Conclusion

Replacing a ceiling fan 3-way switch is a simple project that can be completed in just a few steps. With the right tools and a bit of preparation, you can save yourself the cost of hiring an electrician. Just remember to follow the instructions carefully and take all necessary safety precautions.


Wiring A Ceiling Fan And Light With

Wiring A Ceiling Fan And Light With Diagrams Ptr

Wiring A Ceiling Fan And Light With

Wiring A Ceiling Fan And Light With Diagrams Ptr

Replacing A Ceiling Fan Light With

Replacing A Ceiling Fan Light With Regular Fixture Jlc
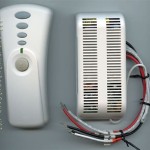
Replace Light With A Ceiling Fan

Planning To Replace Light With A Ceiling Fan Any Thoughts On This Wiring Diagram R Askanelectrician

Ceiling Fan Wiring Schematics

Ceiling Fan Wiring Schematics Fans More

Pull Chain Sd Control Casablanca

Pull Chain Sd Control Casablanca Fan Repair

Wiring A Ceiling Fan And Light With

Wiring A Ceiling Fan And Light With Diagrams Ptr

Ceiling Fan Switch 3 Sd 4 Wire Zing

Ceiling Fan Switch 3 Sd 4 Wire Zing Ear Ze 268s6 Pull Chain Control Replacement Fans Wall Lamps Cabinet Light Com

Ceiling Fan Sd Switch Repair

Ceiling Fan Sd Switch Repair

Pull Chain Switch For A Ceiling Fan

How To Wire A Pull Chain Switch For Ceiling Fan Quora

Leave a Reply

Your email address will not be published. Required fields are marked *

This site uses Akismet to reduce spam. Learn how your comment data is processed.