Replacing a ceiling fan light with regular fixture jlc how to replace pendant replacement ifixit repair guide wiring and diagrams ptr step by install kit smafan com

Replacing A Ceiling Fan Light With Regular Fixture Jlc

Replacing A Ceiling Fan Light With Regular Fixture Jlc

How To Replace A Ceiling Fan With Pendant Light

How To Replace A Ceiling Fan With Pendant Light

Ceiling Fan Light Fixture Replacement Ifixit Repair Guide

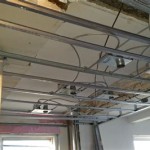
Wiring A Ceiling Fan And Light With Diagrams Ptr

How To Replace A Ceiling Fan With Light Step By

How To Replace A Light With Ceiling Fan Install Step By

Wiring A Ceiling Fan And Light With Diagrams Ptr

Ceiling Fan Light Fixture Replacement Ifixit Repair Guide

How To Replace A Ceiling Fan Light Kit Smafan Com

How To Replace A Light Fixture With Ceiling Fan Projects By Peter

Replacing Ceiling Fan With Hanging Light Fixture Wiring Help Needed Fixtures

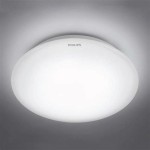
Ceiling Fan Light Kit Installation How To

5 Tips For Replacing A Light Fixture With Ceiling Fan Dig This Design

My Ceiling Lights And Fan Are Connected To The Same Switch When Is Off On Vice Versa How Can I Fix This Quora

Graphic Ceiling Fan With Light Wiring Switch

Average Ceiling Fan Installation Cost 2023 Forbes Home

For Removing Stubborn Glass Domes From Overhead Lights Ceiling Fans

How To Replace A Ceiling Fan Light Socket Doityourself Com
Replacing a ceiling fan light with replace pendant fixture replacement wiring and install how to kit