How to remove and replace a recessed led ceiling light easy ways an bulb 13 steps cover without any damage brightest lumen change lighting with the home depot old housing honor services or canned

How To Remove And Replace A Recessed Led Ceiling Light

Easy Ways To Replace An Led Recessed Light Bulb 13 Steps

Easy Ways To Replace An Led Recessed Light Bulb 13 Steps

How To Remove Recessed Light Cover Without Any Damage Brightest Lumen

Easy Ways To Replace An Led Recessed Light Bulb 13 Steps

How To Change A Recessed Light Bulb

How To Replace Recessed Lighting With Led The Home Depot

How To Change A Recessed Light Bulb

How To Remove Old Recessed Light Housing Honor Services

How To Change A Recessed Or Canned Light Bulb

How To Remove And Replace A Recessed Led Ceiling Light

How To Replace Recessed Lighting With Led The Home Depot

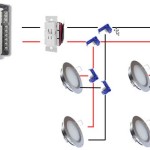
How To Change Downlights Or Recessed Lights In False Ceiling Electrician Singapore Recommended Services

Easy Ways To Replace An Led Recessed Light Bulb 13 Steps

Easy Ways To Replace An Led Recessed Light Bulb 13 Steps

How To Replace Old Recessed Lighting With Led

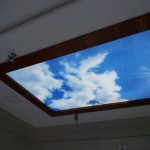
How To Put Recessed Lights In The Ceiling

How To Change A Lightbulb In Recessed Light 3 Easy Solutions

High Ceiling Light Bulb Changer Removal Tool Remover Recessed For Outdoor Bedroom Home Lights Com
Recessed led ceiling light replace an bulb how to remove cover change a lighting with old housing or canned