How to install drop ceiling tiles for a bathroom diy danielle fan with downlights faq lumera living installation tips family handyman the home depot 3 best false lights you can use create better ambience upgrade your airflow ways smarten fans wirecutter prism oasis reviews by hampton bay mena 44 in led indoor outdoor matte black light kit and reversible blades included 92404

How To Install Drop Ceiling Tiles For A Bathroom Diy Danielle

Ceiling Fan With Downlights Faq Lumera Living

Drop Ceiling Tiles Installation Tips Diy Family Handyman

Ceiling Fan With Downlights Faq Lumera Living

How To Install A Ceiling Fan The Home Depot

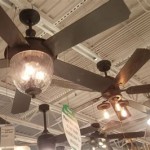
3 Best False Ceiling Lights You Can Use To Create Better Ambience

Upgrade Your Airflow 3 Ways To Smarten Ceiling Fans Wirecutter

Prism Oasis

How To For A Ceiling Fan Reviews By Wirecutter

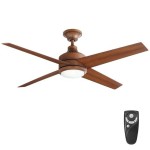
Hampton Bay Mena 44 In Led Indoor Outdoor Matte Black Ceiling Fan With Light Kit And Reversible Blades Included 92404 The Home Depot

How To For A Ceiling Fan Reviews By Wirecutter

How To Install A Light On Ceiling Fan 11 Steps

Prism Oasis

2 Ft X 4 Led Panel Light 4000k Neutral White 72w 9000lm Dimmable Ledmyplace

Running Wire For A Ceiling Fan In Finished Wall

Average Ceiling Fan Installation Cost 2023 Forbes Home

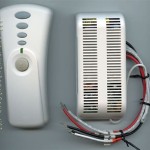
How To Wire And Install A Ceiling Fan With Remote Control Light Fixture Removal

Do S And Don Ts Of Using False Ceiling Venkatesh Buildcon Pvt Ltd

Hampton Bay Southwind 52 In Indoor Led Venetian Broe Ceiling Fan With 5 Reversible Blades Light Kit Downrod And Remote Control 52371 The Home Depot
Drop ceiling tiles for a bathroom fan with downlights faq installation tips how to install the home 3 best false lights you can use fans prism oasis reviews matte black light kit
Related Posts