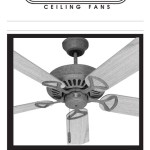
How To Install Hanging Ceiling Fan

How to Install a Hanging Ceiling Fan: A Step-by-Step Guide

Ceiling fans are a stylish and functional addition to any room, providing both comfort and ambiance. Whether you're looking to cool down a hot summer night or circulate air in a stuffy living room, installing a hanging ceiling fan can make a significant difference. Here's a comprehensive guide to help you get the job done safely and efficiently.

Materials and Tools Required

  • Hanging ceiling fan
  • Electrical wire
  • Wire nuts
  • Electrical tape
  • Screwdriver
  • Drill
  • Mounting screws
  • Outlet box
  • Ceiling fan remote control (optional)

Safety Precautions

Before starting the installation, ensure you take the following safety precautions:

  • Turn off the power at the circuit breaker.
  • Use a non-contact voltage tester to confirm that the power is off.
  • Wear safety glasses and work gloves.
  • Use a sturdy ladder or step stool to access the ceiling.

Step-by-Step Installation Guide

1. Prepare the Electrical Wiring

Locate the electrical outlet box in the ceiling and disconnect any existing wires. Connect the black wire from the fan to the black wire from the electrical box, and the white wire from the fan to the white wire from the box. For the ground wire, connect the green or bare copper wire from the fan to the green or bare copper wire from the electrical box.

2. Mount the Outlet Box

If you don't have an existing electrical outlet box in the ceiling, you will need to install one. Use a drill to make holes for the mounting screws, then secure the outlet box to the ceiling.

3. Hang the Mounting Bracket

Attach the mounting bracket to the electrical outlet box using the provided screws. Ensure it is securely fastened.

4. Assemble the Fan

Assemble the fan according to the manufacturer's instructions. This typically involves attaching the blades, motor housing, and light fixture.

5. Hang the Fan

Carefully lift the fan and hang it onto the mounting bracket. Ensure it is securely attached.

6. Connect the Wiring

Connect the wires from the fan to the wires in the outlet box. Black to black, white to white, and ground to ground.

7. Secure the Canopy

Slip the canopy over the mounting bracket and secure it with the provided screws.

8. Test the Fan

Turn on the power at the circuit breaker and test the fan. Make sure it rotates smoothly and there are no unusual noises or vibrations.

9. Install the Remote Control (Optional)

If your fan comes with a remote control, install it according to the manufacturer's instructions.

Congratulations! You have successfully installed your hanging ceiling fan. Enjoy the comfort and style it brings to your space.


Installing A Ceiling Fan Fine

Installing A Ceiling Fan Fine Homebuilding

How To Install A Ceiling Fan Diy

How To Install A Ceiling Fan Diy Guide So Simple Anyone Can Do It

Wiring A Ceiling Fan And Light With

Wiring A Ceiling Fan And Light With Diagrams Ptr

How To Install A Ceiling Fan Diy

How To Install A Ceiling Fan Diy Family Handyman

How To Install A Ceiling Fan Dummies

How To Install A Ceiling Fan Dummies

Easy Installation Ceiling Fan

Hunterexpress Easy Installation Ceiling Fan Hunter

How To Install A Ceiling Fan Sew Woodsy

How To Install A Ceiling Fan Sew Woodsy

How To Install A Ceiling Fan Diy

How To Install A Ceiling Fan Diy Family Handyman

How To Install A Ceiling Fan The Home

How To Install A Ceiling Fan The Home Depot

Installing A Ceiling Fan In Home Or

Installing A Ceiling Fan In Home Or Office Pro Tool Reviews

Leave a Reply

Your email address will not be published. Required fields are marked *

This site uses Akismet to reduce spam. Learn how your comment data is processed.