Worldwide lighting attica 12 63 in x 5 2 light black flush mount e30025 001 the home depot polished nickel 006 ekena millwork 18 od 4 id 8 p ceiling medallion fits canopies up to com project pictures digest medallions lights 3 broe modern contemporary bowl hanging pendant department at therrmed pvc bellevue gecf71146mbk 13 wide build

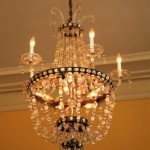
Worldwide Lighting Attica 12 63 In X 5 2 Light Black Flush Mount E30025 001 The Home Depot

Worldwide Lighting Attica 12 63 In X 5 2 Light Black Flush Mount E30025 001 The Home Depot

Worldwide Lighting Attica 12 63 In X 5 2 Light Polished Nickel Flush Mount E30025 006 The Home Depot

Ekena Millwork 18 Od X 4 Id 5 8 P Attica Ceiling Medallion Fits Canopies Up To Com

Attica Ceiling Medallion Project Pictures The Depot Digest Medallions Lights

Attica 3 Light Broe Modern Contemporary Bowl Hanging Pendant In The Lighting Department At Com

Ekena Millwork 18 Od X 4 Id 5 8 P Attica Ceiling Medallion Fits Canopies Up To Com

Attica Ceiling Lights At Com

Attica Therrmed Pvc Ceiling Medallion

Worldwide Lighting Attica 12 63 In X 5 2 Light Polished Nickel Flush Mount E30025 006 The Home Depot

Bellevue Gecf71146mbk Attica 2 Light 13 Wide Flush Mount Build Com

Worldwide Lighting Attica 12 63 In X 5 2 Light Black Flush Mount E30025 001 The Home Depot

Ekena Millwork 18 Od X 4 Id 5 8 P Attica Ceiling Medallion Fits Canopies Up To Com

Worldwide Lighting Attica 12 63 In X 5 2 Light Black Flush Mount E30025 001 The Home Depot

Ekena Millwork Attica 18 In W X L Architectural White Polyurethane Ceiling Medallion The Medallions Department At Com

Paige 6 Attica

Attica Rose Ceiling Medallion Anthroliving

Attica With Rose 26 Wide Primed Round Ceiling Medallion 9t340 Lamps Plus

White Semi Circle Led Wall Light Attica

Fresco Metal Attica
Worldwide lighting attica 12 63 in x ceiling medallion project 3 light broe modern lights at com therrmed pvc bellevue gecf71146mbk 2 13
Related Posts