Replacing a ceiling fan light with regular fixture jlc how to replace install step by easily from an existing retrofitting fine homebuilding wiring and diagrams ptr 5 tips for dig this design running wire in finished wall lights dummies adding switch doityourself com community forums

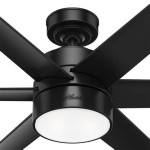
Replacing A Ceiling Fan Light With Regular Fixture Jlc

How To Replace A Light With Ceiling Fan Install Step By

Replacing A Ceiling Fan Light With Regular Fixture Jlc

Easily Install A Ceiling Fan From An Existing Light Fixture

Retrofitting A Ceiling Fan Fine Homebuilding

Wiring A Ceiling Fan And Light With Diagrams Ptr

5 Tips For Replacing A Light Fixture With Ceiling Fan Dig This Design

Running Wire For A Ceiling Fan In Finished Wall

How To Install A Ceiling Fan With Lights

How To Install A Ceiling Fan Dummies

Adding Ceiling Fan And Switch From Existing Doityourself Com Community Forums

How To Install A Ceiling Fan With Light Dengarden

How Install Ceiling Fan Storables

Wiring A Ceiling Fan Step By Installation Guide Wave Electrical Solutions

Ceiling Fan Wiring Diagram Power Into Light

How To Install A Ceiling Fan The Home Depot

Average Ceiling Fan Installation Cost 2024 Forbes Home

How To Install A Light On Ceiling Fan 11 Steps

How To Install A Ceiling Fan Quick Spark

How To Update Modernize Your Ceiling Fan
Replacing a ceiling fan light with install easily from an retrofitting fine wiring and fixture running wire for in lights how to dummies adding switch