How to replace a ceiling fan with pendant light replacing regular fixture jlc install step by add kit your mr electric convert fans smart 11 steps pictures wire control using dimmer switch recessed thecanconverter diy guide change integrated led in or dome rewire that controls an overhead

How To Replace A Ceiling Fan With Pendant Light

Replacing A Ceiling Fan Light With Regular Fixture Jlc

Replacing A Ceiling Fan Light With Regular Fixture Jlc

How To Replace A Light With Ceiling Fan Install Step By

How To Add A Light Kit Your Ceiling Fan Mr Electric

How To Convert Your Fans Smart 11 Steps With Pictures

How To Wire A Ceiling Fan Control Using Dimmer Switch

Convert Recessed Light To Ceiling Fan Thecanconverter

How To Replace A Ceiling Fan Diy Step By Guide

Change Integrated Led Light In Ceiling Fan Or Dome

Rewire A Switch That Controls An To Control Overhead Light Or Fan

2 Function Switch For Ceiling Fan And Light Devices Integrations Smartthings Community

Upgrade Your Airflow 3 Ways To Smarten Ceiling Fans Wirecutter

How To Convert A Ceiling Fan Remote Control

30w Ceiling Fan With Lighting Lamp E27 Converter Base Remote Control F I1z8

How To Wire A Ceiling Fan Control Using Dimmer Switch

3in1 Ceiling Fan With Lighting Lamp E27 Converter Base Remote Control

Ceiling Fans With Remote Control And Light Led Lamp Fan E27 Converter Base Smart Silent For Bedroom Living Room Joom

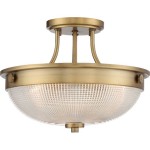
How I Gave My Ceiling Fan A Farmhouse Style Modern Lighting Makeover Light Fixtures

30w Ceiling Fan With Lighting Lamp E27 Converter Base Remote Control F I1z8
Replace a ceiling fan with pendant light replacing install kit to your how convert fans smart wire control recessed diy step integrated led in rewire switch that controls an
Related Posts