4 ways to replace a light bulb in ceiling fan wikihow for removing stubborn glass domes from overhead lights fans flush mount fixture how change remove the cover with projects by peter step install modern conversion kits

4 Ways To Replace A Light Bulb In Ceiling Fan Wikihow

4 Ways To Replace A Light Bulb In Ceiling Fan Wikihow

4 Ways To Replace A Light Bulb In Ceiling Fan Wikihow

For Removing Stubborn Glass Domes From Overhead Lights Ceiling Fans

4 Ways To Replace A Light Bulb In Ceiling Fan Wikihow

4 Ways To Replace A Light Bulb In Ceiling Fan Wikihow

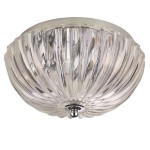
Flush Mount Ceiling Light Fixture How To Change A Bulb Remove The Glass Cover

For Removing Stubborn Glass Domes From Overhead Lights Ceiling Fans

How To Replace A Light Fixture With Ceiling Fan Projects By Peter

How To Replace A Ceiling Fan With Light Step By

How To Install Modern Ceiling Light Cover Conversion Kits

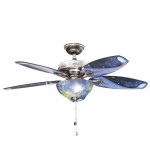
Parrot Uncle Kielah 48 In Integrated Led Broe Flush Mount Ceiling Fan With Light And Remote Control F6298110v The Home Depot

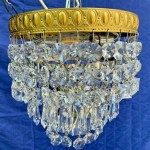
Parrot Uncle 52 In Modern Chrome Flush Mount Crystal Ceiling Fan With Light Kit And Remote Control F6328110v The Home Depot

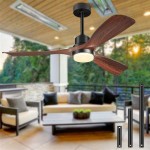
Parrot Uncle 48 In Wooden 5 Blade Flush Mount Matte Black Ceiling Fan With Remote Control And Light Kit F6233110v The Home Depot

Harbor Breeze Mazon 44 In Black Led Indoor Flush Mount Ceiling Fan With Light Remote 3 Blade The Fans Department At Com

42 Traditional Flush Mount Reversible Ceiling Fan With Lighting And R Parrotuncle

Private Brand Unbranded Hugger 52 In Led Indoor Black Ceiling Fan With Light Kit Al383led Bk The Home Depot

Parrot Uncle 48 In Farmhouse Bamboo Flush Mount Matte Black Ceiling Fan With Remote Control And Light Kit F6345110v The Home Depot

Vicinity Low Profile With Led Light 52 Inch Ceiling Fan Hunter

48 Modern Flush Mount Reversible Crytsal Ceiling Fan With Lighting An Parrotuncle
Replace a light bulb in ceiling fan overhead lights fans flush mount fixture with modern cover conversion kits
Related Posts