Mounting light fixtures fine homebuilding how to install a vintage ceiling fixture simple decorating tips homeserve usa lighting forbes home pendant lights diy family handyman ehow new replacement recessed fixthisbuildthat replace fan with

Mounting Light Fixtures Fine Homebuilding

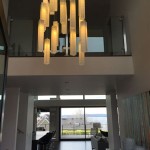
How To Install A Vintage Ceiling Light Fixture Simple Decorating Tips

How To Install Ceiling Light Homeserve Usa

How To Install A Lighting Fixture Forbes Home

How To Install Pendant Lights Homeserve Usa

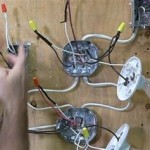
How To Install A Ceiling Light Fixture Diy Family Handyman

How To Install A Ceiling Light Fixture Diy Family Handyman

How To Install Ceiling Light Fixtures Ehow

How To Install Ceiling Light Fixtures New Replacement Pendant Lighting

How To Install Recessed Lighting Fixthisbuildthat

How To Replace A Ceiling Fan With Pendant Light

How To Install A Ceiling Light Fixture 7 Easy Steps Diy

How To Hang Fairy Lights On Ceiling

Making A Ceiling Light With Diffuser From Lamp Shade Young House Love

How To Hang Fairy Lights On Ceiling

6 Steps How To Install Led Strip Lights On Ceiling

How To Install Led Flat Panel Light Ox Lighting

How To Install A Ceiling Light Fixture Diy Family Handyman

How To Install Ceiling Mount Light Fixture Jonny Diy

How To Install A Twinkle Light Ceiling 1000bulbs Blog
Mounting light fixtures fine homebuilding vintage ceiling fixture how to install a lighting pendant lights recessed replace fan with