Harbor Breeze Ceiling Fans Removal

Essential Aspects of Harbor Breeze Ceiling Fans Removal

Harbor Breeze ceiling fans are a popular choice for homes and businesses alike. They are known for their durability, efficiency, and affordability. However, even the best ceiling fans will eventually need to be replaced. When that time comes, it is important to know how to remove them safely and correctly.

This article will discuss the essential aspects of Harbor Breeze ceiling fans removal. We will cover everything from safety precautions to step-by-step instructions.

Essential Aspects of Harbor Breeze Ceiling Fans Removal

There are several essential aspects to consider when removing a Harbor Breeze ceiling fan. These include:

  • Safety: It is important to take safety precautions when removing a ceiling fan. This includes turning off the power to the fan and wearing safety glasses.
  • Tools: You will need a few tools to remove a ceiling fan. These include a screwdriver, a wrench, and a ladder.
  • Instructions: It is important to follow the instructions for removing a ceiling fan carefully. This will help to ensure that the fan is removed safely and correctly.

Safety Precautions

Before you begin removing a Harbor Breeze ceiling fan, it is important to take the following safety precautions:

  • Turn off the power to the fan at the circuit breaker panel.
  • Wear safety glasses to protect your eyes from falling debris.
  • Use a ladder to reach the fan safely.

Tools Required

To remove a Harbor Breeze ceiling fan, you will need the following tools:

  • Phillips head screwdriver
  • Adjustable wrench
  • Ladder

Step-by-Step Instructions

Follow these step-by-step instructions to remove a Harbor Breeze ceiling fan:

  1. Turn off the power to the fan at the circuit breaker panel.
  2. Remove the light bulbs from the fan.
  3. Remove the canopy by unscrewing the screws that hold it in place.
  4. Disconnect the wires from the fan motor. Be sure to label the wires so that you can reconnect them correctly later.
  5. Remove the mounting bracket from the ceiling by unscrewing the screws that hold it in place.
  6. Carefully lower the fan from the ceiling.

Conclusion

Removing a Harbor Breeze ceiling fan is a relatively simple task that can be completed in a few minutes. By following the safety precautions and instructions in this article, you can safely and correctly remove your ceiling fan.


Harbor Breeze Ceiling Fan Removing

Harbor Breeze Ceiling Fan Removing Tiktok Search

Harbor Breeze 42868 Prestwick

Harbor Breeze 42868 Prestwick Retractable Fan User Manual

Harbor Breeze Centreville 52 In Antique

Harbor Breeze Centreville 52 In Antique Brass Led Indoor Flush Mount Ceiling Fan With Light 5 Blade The Fans Department At Com

Light Ceiling Fan Broe

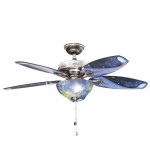
Harbor Breeze Hugger 42 In 1 Light Ceiling Fan Broe 5 Reversible Blades 41550 Rona

Harbor Breeze Fan Installation

Harbor Breeze Fan Installation Instructions Easy Steps Hampton Bay Ceiling Fans Lighting

Replace A Light Bulb In Ceiling Fan

4 Ways To Replace A Light Bulb In Ceiling Fan Wikihow

Harbor Breeze Replacement Parts

Harbor Breeze Replacement Parts Ceiling Fans Remotes More Hampton Bay Lighting

Harbor Breeze Oakham 70 In Broe Led

Harbor Breeze Oakham 70 In Broe Led Indoor Ceiling Fan With Light Remote 5 Blade The Fans Department At Com

Harbor Breeze Windshore Easy2hang 52 In

Harbor Breeze Windshore Easy2hang 52 In Matte Black Indoor Ceiling Fan With Light 5 Blade The Fans Department At Com

Harbor Breeze Armitage 52 In Brushed

Harbor Breeze Armitage 52 In Brushed Nickel Led Indoor Flush Mount Ceiling Fan With Light 5 Blade The Fans Department At Com


Leave a Reply

Your email address will not be published. Required fields are marked *

This site uses Akismet to reduce spam. Learn how your comment data is processed.