Hampton bay menage 52 in integrated led indoor low profile brushed nickel ceiling fan with light kit 14600 the home depot 56 14660 and remote control works google alexa 14660w 718212146002 oil rubbed broe 14661 com white 14603 how to install 44 mena by smart hubspace 14600hr replacement parts

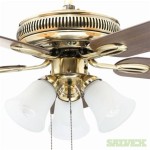
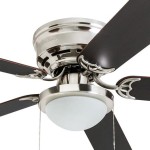
Hampton Bay Menage 52 In Integrated Led Indoor Low Profile Brushed Nickel Ceiling Fan With Light Kit 14600 The Home Depot

Hampton Bay Menage 52 In Integrated Led Indoor Low Profile Brushed Nickel Ceiling Fan With Light Kit 14600 The Home Depot

Hampton Bay Menage 56 In Integrated Led Indoor Low Profile Brushed Nickel Ceiling Fan With Light Kit 14660 The Home Depot

Hampton Bay Menage 56 In Integrated Led Brushed Nickel Ceiling Fan With Light And Remote Control Works Google Alexa 14660w The Home Depot

Hampton Bay Menage 52 Led Low Profile Ceiling Fan Brushed Nickel 718212146002

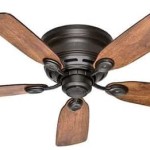
Hampton Bay Menage 56 In Integrated Led Indoor Low Profile Oil Rubbed Broe Ceiling Fan With Light Kit 14661 The Home Depot

Hampton Bay Menage 52 In Integrated Led Indoor Low Profile Brushed Nickel Ceiling Fan With Light Kit Com

Hampton Bay Menage 52 In Integrated Led Indoor Low Profile White Ceiling Fan With Light Kit 14603 The Home Depot

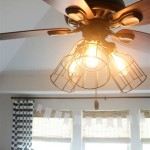
How To Install The 44 In Mena Ceiling Fan By Hampton Bay

Hampton Bay Menage 52 In Led Indoor Brushed Nickel Smart Hubspace Ceiling Fan With Light And Remote 14600hr The Home Depot

Menage 52 In Led Low Profile Oil Rubbed Broe Ceiling Fan Replacement Parts

Hampton Bay Menage 52 Led Low Profile Oil Rubbed Broe Ceiling Fan Used Com

Hampton Bay Menage 52 Led Low Profile Ceiling Fan Brushed Nickel

Hampton Bay Menage 56 In Led Indoor Oil Rubbed Broe Smart Hubspace Ceiling Fan With Light And Remote 14661hr The Home Depot

Hampton Bay Menage 52 In Integrated Led Indoor Low Profile Brushed Nickel Ceiling Fan With Light Kit 14600 The Home Depot

Hampton Bay Norwood 52 In Indoor Outdoor Led Matte Black Damp Rated Downrod Ceiling Fan With Light Kit And 5 Reversible Blades Yahoo Ping

How To Install The Mena Ceiling Fan By Hampton Bay

Hampton Bay Menage 52 In Integrated Led Indoor Low Profile Brushed Nickel Ceiling Fan With Light Kit 14600 The Home Depot

How To Install The Mena Ceiling Fan By Hampton Bay

How To Install A Hampton Bay Ceiling Fan With Pictures Wikihow
Brushed nickel ceiling fan hampton bay menage 52 led low profile oil rubbed broe white with light kit 14603 mena by in indoor