Fan accessories replacement glass for diffe ceiling fans the lighting harbor breeze henderson 3 in x 7 dome white frost tinted light shade lip fitter shades department at com aspen creative corporation 4 1 2 frosted ribbed bell shaped pack 23022 home depot fixture cover lamp vintage square globes more bowl globe paint covers clear wave kit kits perfect illuminating your with yahoo ping martec precision diffuser preglass

Fan Accessories Replacement Glass For Diffe Ceiling Fans The Lighting

Harbor Breeze Henderson 3 In X 7 Dome White Frost Tinted Glass Ceiling Fan Light Shade Lip Fitter The Shades Department At Com

Aspen Creative Corporation 4 1 2 In Frosted Ribbed Bell Shaped Ceiling Fan Replacement Glass Shade Pack 23022 The Home Depot

Ceiling Light Fixture Cover Lamp Shade

Light Shades At Com

Vintage Square Glass Ceiling Light Fixture Replacement Cover

Glass Lamp Shades Replacement Globes More

White Ceiling Fan Light Cover Replacement Glass Shade Bowl Globe Frosted Paint

Ceiling Fan Light Covers Clear Wave Glass Shade Lamp Replacement Kit For Kits Perfect Illuminating Your Home With Yahoo Ping

Vintage Lamp Shade Ceiling Light Fixture Cover

Martec Precision Replacement Glass Light Cover Diffuser Preglass

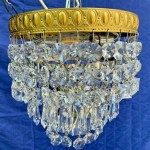
Crystal Dome Light Diffuser Clear 9 5 Diameter 4 Deep

Ceiling Fan Glass Shade Light Cover Replacement Globes For Pendant Lights

Hampton Bay Everbilt Frosted Replacement Glass G14927 1 The Home Depot White Ceiling Fan Light Cover Shades

Seeded Glass Shade Replacement Globes For Light Fixtures The Lamp Goods

Reviews For Ez Shade Clip On Light Bulb Cover 9 1 Inches White Polycarbonate Uv Resistant Globe Replacement Ceiling Pg 2 The Home Depot

Vintage Glass Drum Ceiling Light Cover 7 8 Inch Fitters

Pleated Frosted Glass Ceiling Fan Light Shades True Value

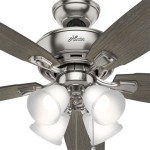
Martec Ceiling Fan Replacement Glass Light Spot
Fan accessories replacement glass for tinted ceiling light shade fixture shades at com vintage square lamp white cover clear wave martec precision