Replacing a ceiling fan light with regular fixture jlc how to replace install the art of manliness switch out tinged blue recessed pendant an old fluorescent young house love pull chain diy family handyman snowinspring 2 pcs ze 228s 3 sd wire replacement part controlpull brass com lamp 250v 125v petal handle copper for wall sconces lazada ph home electrical repairs mounted change without hiring electrician

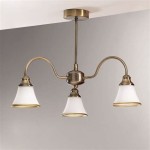
Replacing A Ceiling Fan Light With Regular Fixture Jlc

Replacing A Ceiling Fan Light With Regular Fixture Jlc

How To Replace Install A Light Fixture The Art Of Manliness

How To Switch Out A Light Fixture Tinged Blue

Replace Recessed Light With A Pendant Fixture

How To Replace An Old Fluorescent Light Fixture Young House Love

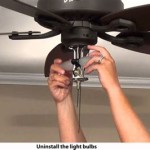
How To Replace A Pull Chain Light Fixture Diy Family Handyman

Snowinspring 2 Pcs Fan Light Switch Ze 228s 3 Sd Wire Ceiling Replacement Part Controlpull Chain Brass Com

Replacement Lamp Pull Chain Switch 250v 125v 3 Wire Petal Handle Ceiling Fan Light Copper For Wall Sconces Lazada Ph

Home Electrical Repairs How To Replace A Ceiling Mounted Pull Chain Light Fixture

How To Change A Light Fixture Without Hiring An Electrician

How To Install Ceiling Light Fixtures Ehow

Replacement 3wire Beads Chain Wall Light Fan Ceiling Switch Pull Cord Strids

Cost To Install Or Hang A Light Fixture Diy Vs Hire Pro Angi

Is It Safe To Change A Light Fixture If The Switch Off Thediyplan

How To Install A Ceiling Light Fixture Diy Family Handyman

Set Of 2 Cordless Ceiling Wall Light W Remote Switch Wireless Lighting Ceilings Lights Hanging Lamps

How To Change A Light Fixture Without Hiring An Electrician

Solving 5 Common Light Fixture Problems
Replacing a ceiling fan light with replace install fixture how to switch out recessed pendant old fluorescent pull chain diy snowinspring 2 pcs ze replacement lamp 250v without hiring an electrician