Harbor breeze 2 setting chrome ceiling fan switch in the accessories department at com 1 34 red black plastic indoor universal controls 85 pull chain how to change a light 6 easy steps replace lighting installation from lowe s waveport 52 replacement kit armitage 42 white led flush mount with 4 blade fans brushed nickel 5 mazon 44 remote 3

Harbor Breeze 2 Setting Chrome Ceiling Fan Switch In The Accessories Department At Com

Harbor Breeze 1 34 In Red Black Plastic Indoor Universal Ceiling Fan Switch At Com

Fan Controls At Com

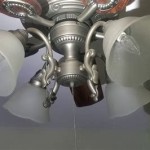
Harbor Breeze 1 85 In Black Plastic Indoor Universal Ceiling Fan Pull Chain The Accessories Department At Com

How To Change A Light Switch In 6 Easy Steps

How To Replace A Light Switch

Lighting Ceiling Fan Installation From Lowe S

Harbor Breeze Waveport 52 In Ceiling Fan Replacement Kit At Com

Harbor Breeze Armitage 42 In White Led Indoor Flush Mount Ceiling Fan With Light 4 Blade The Fans Department At Com

Harbor Breeze Armitage 52 In Brushed Nickel Led Indoor Flush Mount Ceiling Fan With Light 5 Blade The Fans Department At Com

Harbor Breeze Mazon 44 In Brushed Nickel Led Indoor Flush Mount Ceiling Fan With Light Remote 3 Blade The Fans Department At Com

Harbor Breeze Armitage 52 In Broe Led Indoor Flush Mount Ceiling Fan With Light 5 Blade The Fans Department At Com

Harbor Breeze Hamilton 52 In Matte Black Led Indoor Downrod Or Flush Mount Ceiling Fan With Light 5 Blade The Fans Department At Com

Harbor Breeze Crestwell 52 In Matte Black Color Changing Indoor Flush Mount Ceiling Fan With Light Remote 5 Blade The Fans Department At Com

Hunter Quartino 44 In Matte Black Led Indoor Flush Mount Ceiling Fan With Light 5 Blade The Fans Department At Com

Hunter Bennett 52 In Matte Black Led Indoor Flush Mount Ceiling Fan With Light Remote 5 Blade The Fans Department At Com

Ceiling Fans More Com

Harbor Breeze Crestwell 52 In Brushed Nickel Color Changing Indoor Flush Mount Ceiling Fan With Light Remote 5 Blade The Fans Department At Com

Hunter Fans

Hunter Toledo Easy Install 52 In Matte Black Led Indoor Ceiling Fan With Light 6 Blade The Fans Department At Com
Chrome ceiling fan switch universal at controls com pull chain how to change a light in 6 easy replace lighting installation replacement kit harbor breeze armitage 42 white led 52 brushed indoor flush mount