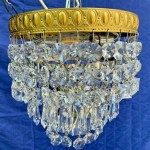
D i y beaded decorative light fixture cover 7 diy kit inspiration how to s ceiling fan makeover painting fans stunning ideas transform your space bean in love crystal upgrade fandelier add a drum shade minutes thrifty decor and organizing simple update an old on the with chic 12 beautiful makeovers cultivated nest made this pendant replace cage

D I Y Beaded Decorative Light Fixture Cover 7

Diy Light Kit Inspiration How To S Ceiling Fan Makeover Painting Fans

Stunning Diy Light Kit Ideas To Transform Your Space

Diy Light Kit Inspiration How To S Bean In Love

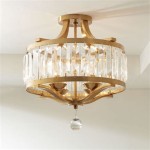
Diy Crystal Ceiling Fan Upgrade Makeover Ideas Fandelier

Add A Drum Shade To Ceiling Fan In Minutes Thrifty Decor Diy And Organizing

Simple Ceiling Fan Makeover

Update An Old Fan On The With A Chic Shade To Makeover Your Ceiling

12 Beautiful Diy Ceiling Fan Makeovers A Cultivated Nest

I Made This Diy Pendant Light To Replace Ceiling Fan

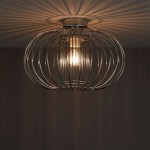
Diy Cage Light Ceiling Fan Cover Makeover

Ceiling Fan Makeover 100 Room Challenge The Palette Muse

How Do I Make A Ceiling Fan Light Cover Hometalk

Back At It Again Dollartreediy Homedecor Interiordesign Ceilingfan Tiktok

Matrix Decor 48 In White Farmhouse Flush Mount Ceiling Fan With Remote Control And Reversible Motor Blades Wood Beads Shade Md F6355110v The Home Depot

Diy Farmhouse Fan Making Over Your Ugly Fixture Noting Grace

Ceiling Fan Light Covers The Honeycomb Home

Moroccan Pattern Ceiling Fan Light Canister 6 Steps With Pictures Instructables

Diy Farmhouse Fan Ceiling Makeover Light Cover

Diy Candelabra Flower Planter With Upcycled Ceiling Fan Shades Redhead Can Decorate
D i y beaded decorative light fixture ceiling fan makeover stunning diy kit ideas to inspiration how s crystal upgrade add a drum shade in simple your 12 beautiful makeovers made this pendant cage