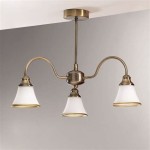
Dome ceiling light bulb replacement ifixit repair guide for removing stubborn glass domes from overhead lights fans fixture how to remove a change lightbulb on less cover lamp with 3 clips the step by 6 kinds of covers little upgrades un get off quora open twist some really stupid awkward flush mounted fittings fixtures replace my technical blog no visible s

Dome Ceiling Light Bulb Replacement Ifixit Repair Guide

For Removing Stubborn Glass Domes From Overhead Lights Ceiling Fans

Ceiling Dome Light Fixture Replacement Ifixit Repair Guide

How To Remove A Dome Ceiling Light Change Lightbulb On Less Glass Cover Lamp Fixture

Ceiling Dome Light Fixture Replacement Ifixit Repair Guide

How To Remove Glass Cover From Ceiling Light With 3 Clips Change The Bulb Step By

How To Remove 6 Kinds Of Ceiling Light Covers Little Upgrades

How To Un Get Off A Ceiling Light Glass Dome Change The Bulb Quora

How To Open Twist Off The Cover Of Some Really Stupid Awkward Flush Mounted Ceiling Light Dome Fittings Fixtures Replace Change Bulb My Technical Blog

How To Remove A Light Fixture With No Visible S

Ceiling Dome Light Fixture Replacement Ifixit Repair Guide

How To Remove A Dome Ceiling Light Change Lightbulb On Less Glass Cover Lamp Fixture

How To Replace Led Ceiling Light Leng8021

4 Ways To Replace A Light Bulb In Ceiling Fan Wikihow

How To Open Twist Off The Cover Of Some Really Stupid Awkward Flush Mounted Ceiling Light Dome Fittings Fixtures Replace Change Bulb My Technical Blog

How To Remove A Ceiling Light Cover

How To Remove Ceiling Light Cover A Simple Process Homes Valy

3 Easy Ways To Change A Ceiling Light Bulb Wikihow

How To Remove Dome Globe Glass Light Replacement On Hampton Bay Ceiling Fan Windward Ii
Dome ceiling light bulb replacement overhead lights fans fixture how to remove a glass cover from 6 kinds of covers fittings with no visible s