Home electrical repairs how to replace a ceiling mounted pull chain light fixture socket 13 steps with pictures install the art of manliness stanley tools fan doityourself com replacing regular jlc porcelain sockets ehow

Home Electrical Repairs How To Replace A Ceiling Mounted Pull Chain Light Fixture

How To Replace A Ceiling Light Socket 13 Steps With Pictures

How To Replace A Ceiling Light Socket 13 Steps With Pictures

How To Replace Install A Light Fixture The Art Of Manliness

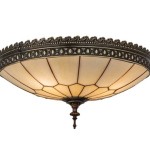
How To Replace A Ceiling Light Fixture Stanley Tools

How To Replace Install A Light Fixture The Art Of Manliness

How To Replace A Ceiling Light Socket 13 Steps With Pictures

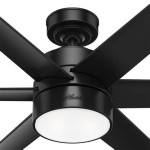
How To Replace A Ceiling Fan Light Socket Doityourself Com

Replacing A Ceiling Fan Light With Regular Fixture Jlc

How To Replace Porcelain Light Sockets Ehow

How To Replace A Ceiling Light Socket 13 Steps With Pictures

Mounting Light Fixtures Fine Homebuilding

How To Replace A Ceiling Fan With Pendant Light

How To Replace Install A Light Fixture The Art Of Manliness

Electrical Light Socket Wiring

Replace Recessed Light With A Pendant Fixture

How To Replace A Ceiling Light Fixture Stanley Tools

How To Install A Ceiling Light Fixture Diy Family Handyman

Repair A Light Fixture Diy Family Handyman

Replace Recessed Light With A Pendant Fixture
Pull chain light fixture how to replace a ceiling socket install fan replacing with porcelain sockets