Womo bowl shaped ceiling light wm1020 shallow lamp minimalist wooden 1 head aisle semi flush mount clearhalo modern simple wrought iron log ce bulbsquare brown bamboo lighting fixture low uolfin mid century center 3 brass gold with handcraft ceramic flowers s73anjhd23776mr the home depot river of goods yara 13 875 in bulb black metal pendant and shade 20624 golden crystal embedded for living room dining bedroom kitchen island hallway entryway shein tube 6 8 10 chandeliers down rustic scalloped hut jute rope suspension wood

Womo Bowl Shaped Ceiling Light Wm1020

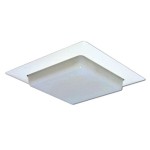
Shallow Bowl Shaped Ceiling Lamp Minimalist Wooden 1 Head Aisle Semi Flush Mount Light Clearhalo

Modern Simple Wrought Iron Log Bowl Shaped 1 Light Semi Flush Mount Ce Bulbsquare

Shallow Bowl Shaped Ceiling Lamp Minimalist Wooden 1 Head Aisle Semi Flush Mount Light Clearhalo

Bowl Shaped Brown Bamboo Flush Mount Lighting Fixture Low

Shallow Bowl Shaped Ceiling Lamp Minimalist Wooden 1 Head Aisle Semi Flush Mount Light Clearhalo

Uolfin Mid Century Modern Center Bowl Ceiling Light 3 Brass Gold Semi Flush Mount With Handcraft Ceramic Flowers S73anjhd23776mr The Home Depot

River Of Goods Yara 13 875 In 1 Bulb Black Metal Pendant Light With Bowl Shaped And Gold Shade 20624 The Home Depot

Golden Crystal Embedded Ceiling Light Fixture Bowl Shaped For Living Room Dining Bedroom Kitchen Island Hallway Entryway Shein

Modern Crystal Tube 6 8 10 Light Bowl Shaped Chandeliers Bulbsquare

1 Head Down Lighting Pendant Rustic Scalloped Bowl Hut Shaped Jute Rope Ceiling Suspension Lamp In Wood For Dining Room Clearhalo Light

Bowl Shaped Mica Hanging Light With Brown Border And Natural Foliage Sue Johnson

Led Ceiling Lamp Bowl Shaped Home Decoration Modern Light Lighting China Made In Com

Hammered Brass Bowl Shaped Interior Pendant Hanging Light

Serenia Black 01270 Modern Gypsum Bowl Shaped Pendant Ceiling Light Ø60 Flobali
/product/51/651707/1.jpg?strip=all "Generic 11 8 Inches Modern Crystal Led Ceiling Lighting Clear Beads Bowl Star Shaped Chandelier Light Jumia Ghana")
Generic 11 8 Inches Modern Crystal Led Ceiling Lighting Clear Beads Bowl Star Shaped Chandelier Light Jumia Ghana

Bowl Vintage Glass Bauhaus Pendant Light Free Homelights

Large Moonstone Bowl Ceiling Light By Jefferson Co For At Pamono

Elegant Designs Elipse Crystal 13 Inch Modern Metal 2 Light Bowl Shaped Ceiling Flush Mount Fixture For Bedroom Living Room Entryway Hallway Foyer Dining Antique Brass Com

Led Iron Aymh Copper Bowl Shaped Ceiling Lamp Hanging Light For Decoration
Womo bowl shaped ceiling light wm1020 shallow lamp semi flush mount ce bulbsquare brown bamboo center bulb black metal pendant embedded fixture chandeliers clearhalo