Buy ayr globe flush bathroom ceiling light 12cm ip65 in tay rippled glass modern brushed chrome ip44 rated class 2 contemporary polished revive matt black 1 semi litecraft mari large diy at b q blanche crystal 3 city draco bhs lamqee 8 7 watt integrated led mount round for kitchen bedroom hallway 06ftl0173abk the home depot

Buy Ayr Globe Flush Bathroom Ceiling Light 12cm Ip65 In

Buy Ayr Globe Flush Bathroom Ceiling Light 12cm Ip65 In

Buy Tay Rippled Glass Flush Bathroom Ceiling Light Ip65 In

Modern Brushed Chrome Bathroom Ceiling Light Ip44 Rated Class 2

Contemporary Polished Chrome Bathroom Flush Ceiling Light

Revive Matt Black 1 Light Semi Flush Bathroom Ceiling

Litecraft Mari Black Large Flush Bathroom Ceiling Light Diy At B Q

Blanche Crystal Glass 3 Light Flush Bathroom Ceiling Buy At City

Draco Flush Ceiling Light Chrome Bhs

Revive Matt Black 1 Light Semi Flush Bathroom Ceiling

Lamqee Crystal 8 7 In Watt Chrome Integrated Led Flush Mount Round Ceiling Light For Kitchen Bedroom Bathroom Hallway 06ftl0173abk The Home Depot

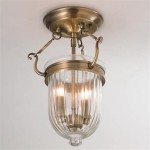
Buy Kwaga Brass Flush Bathroom Ceiling Light Ip65 In

Modern Flush Mount Lighting West Elm

Litecraft Mari Brass 18w Large Led Flush Bathroom Ceiling Light Diy At B Q

Ashley Bathroom Ceiling Flush Mount Light 3x60w E27 In Polished Chrome The Lighting

Modern Classic Flush Bathroom Ceiling Light In Chrome With Opal Glass

John Lewis Moonbeam Led Flush Bathroom Ceiling Light White

Bathroom Ceiling Lighting Ideas For Your Home The Zhush

Revive Matt Black 1 Light Semi Flush Bathroom Ceiling

Mode Led Ip44 Round Flush Bathroom Ceiling Light Victoriaplum Com
Ayr globe flush bathroom ceiling light buy tay rippled glass modern brushed chrome contemporary polished semi large draco bhs lamqee crystal 8 7 in watt
Related Posts